
Templatizing Augmented Reality in Unity with IMEX

testing Tyler’s template with mobile device trigger
In order to learn more about the construction of Augmented Reality (AR) content – and make its creation accessible to a wider audience, Creative Designer Tyler Greer has been exploring what’s possible within the software, Unity. For those unfamiliar, Unity is an industry-standard platform, born from game development, that is used for creating 3D environments and models. The tool is available for free for personal and academic use. It features multiple add-ons that allow for the development of not just gaming worlds but also AR interactions.
While discussing the projects he’d been developing with me, it started to seem potentially useful to create a sort of template for use with Unity. This template could serve as a scaffold on which students or faculty could easy graft found 3D objects that could be called up in AR via mobile devices.
In Tyler’s words, here’s how he went about developing the template:
In order to create this Augmented Reality template, I utilized the game engine Unity and its native AR support called Vuforia. First thing that had to be done was to access the development portal for Vuforia through a web browser. Once I was inside, I requested a license key and created an image database. However, before I could create an image database, I had to create an image. I created a quick black and white mark in Adobe Illustrator that could be referenced for the image database. Once this image was processed through the development portal and downloaded for Unity, I moved over to Unity itself to begin assembling my AR application.
To set up the scene properly, I first went to Player Settings and made sure that the Vuforia Library was being referenced in the Unity game engine. After that setting was changed I imported the image database that I downloaded from the Vuforia development portal. Once imported, I started adding the Vuforia assets into my project. First, I added the AR camera which this will replace the default camera in the project. Once that camera is placed, I accessed the Vuforia Settings from the Inspector window: This is where I copied the license key and also told the camera to recognize the database when the image is seen through a device’s camera.
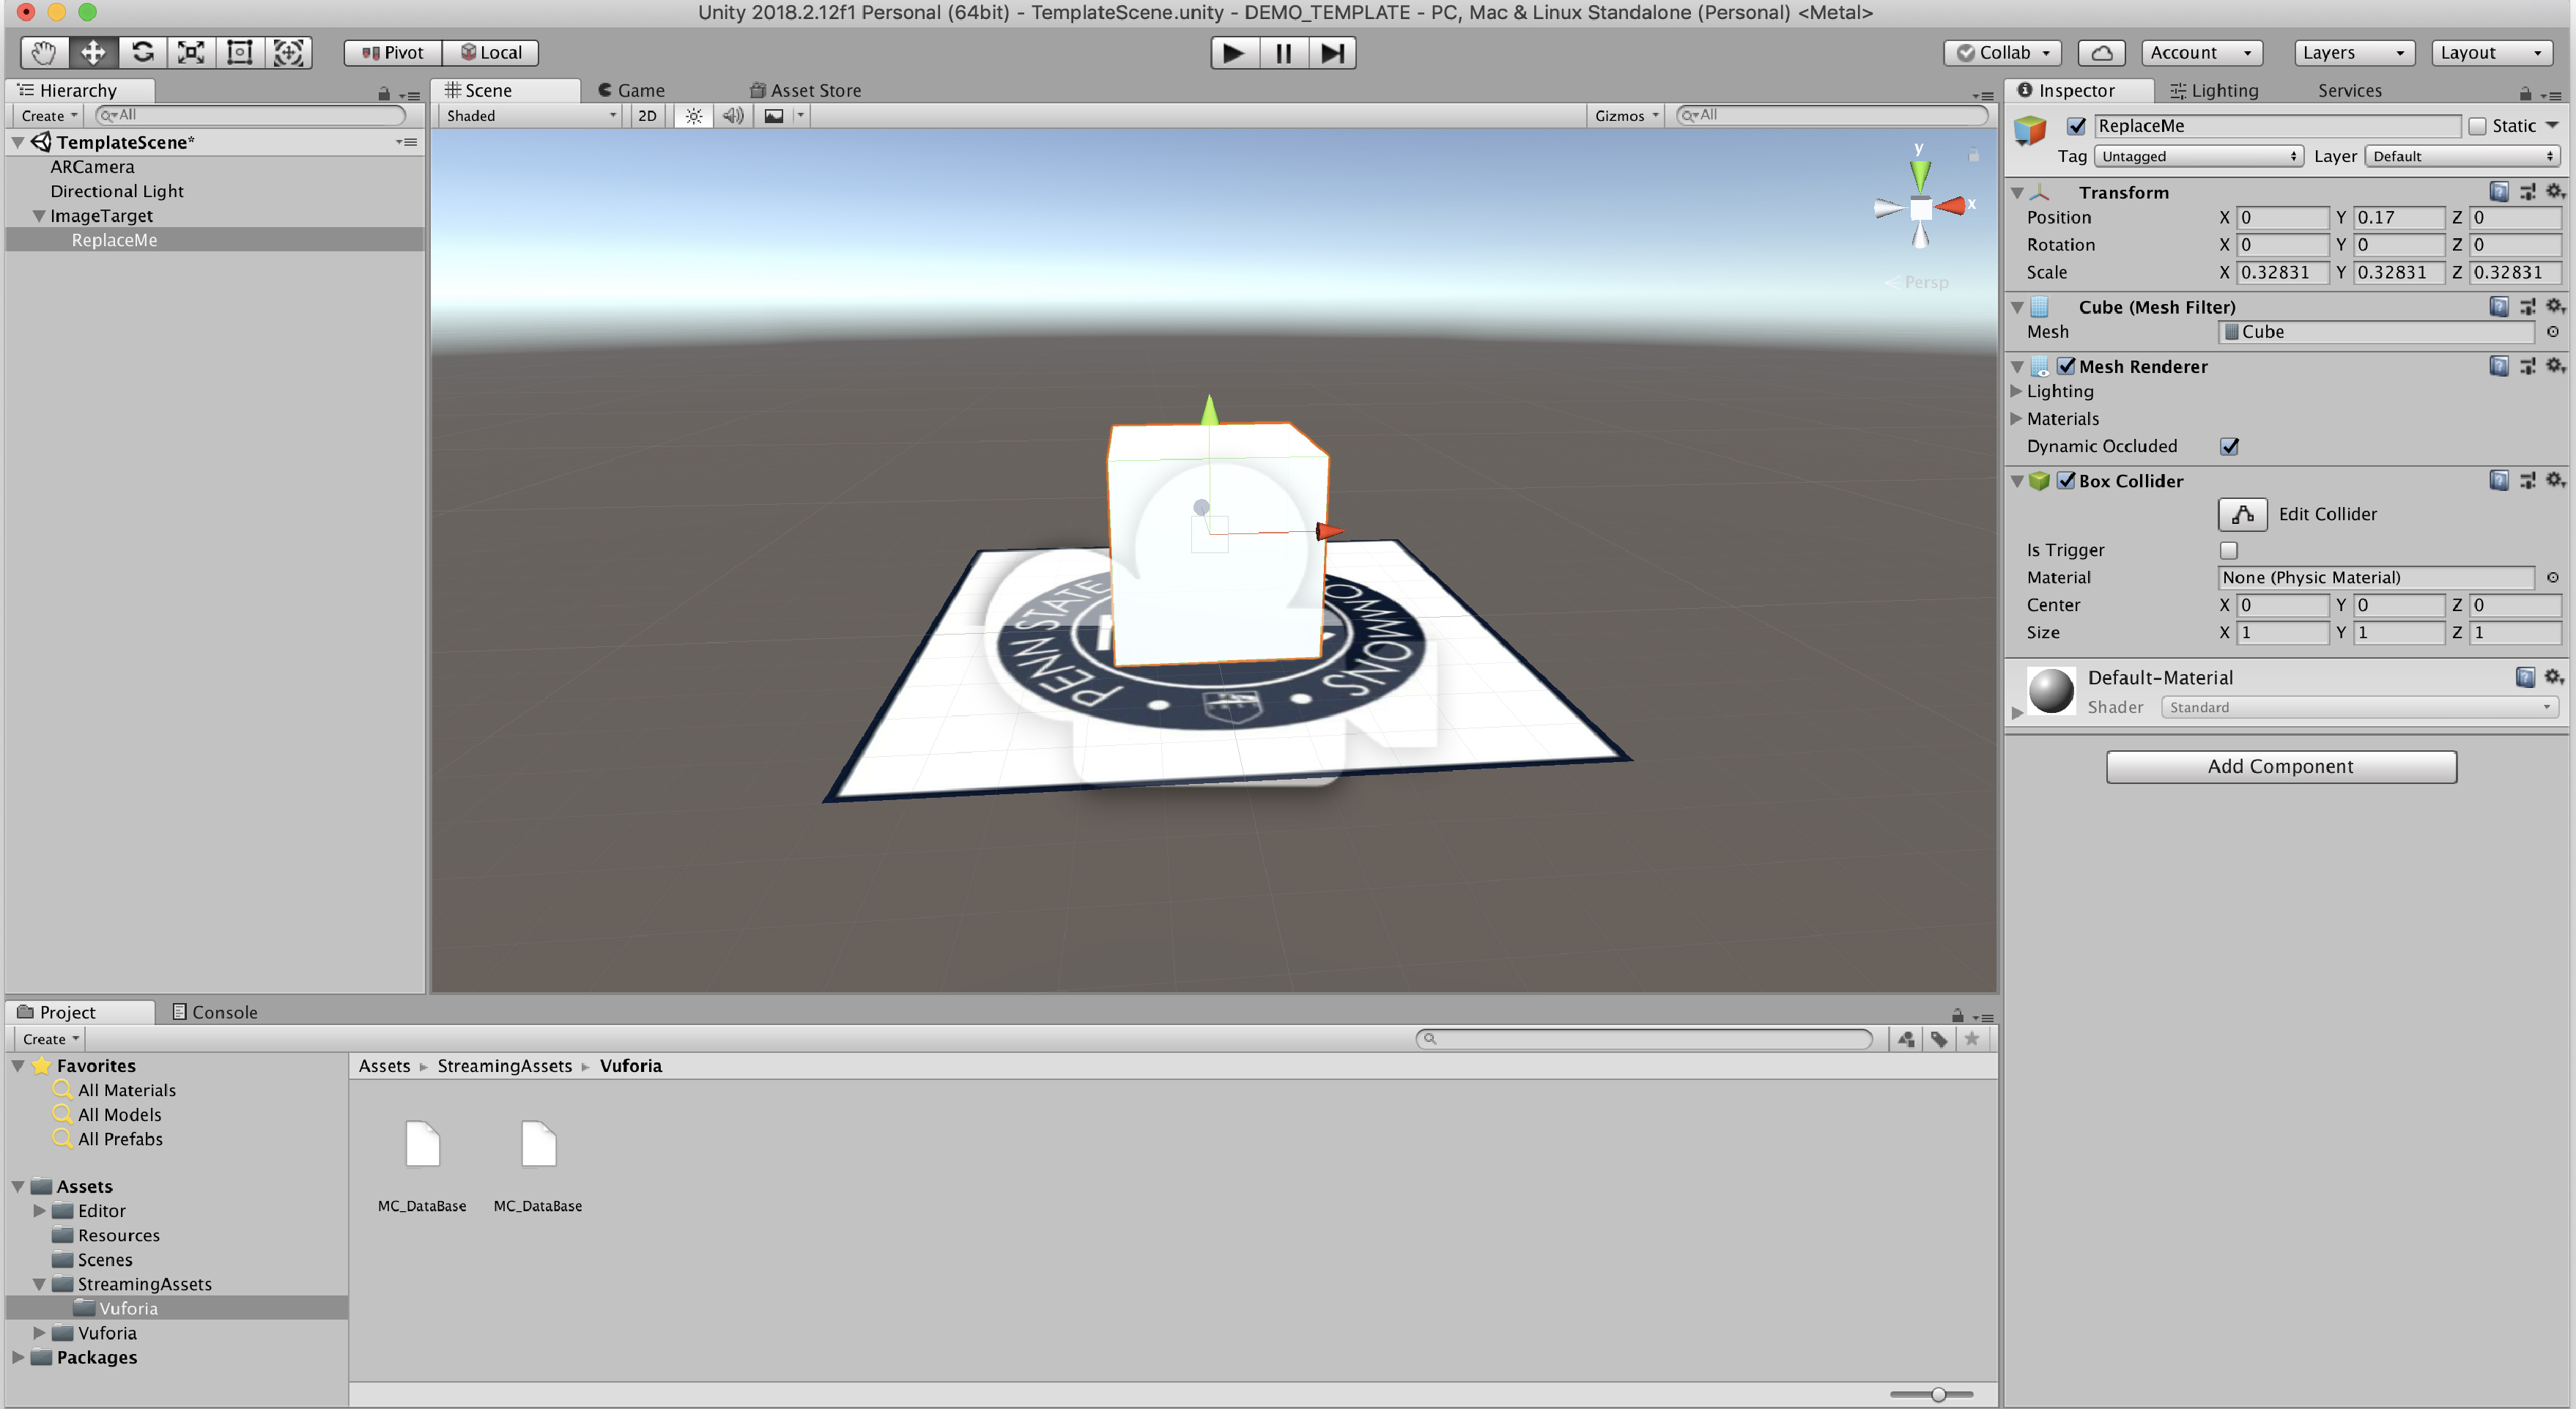
Once those settings were changed, I added in the image target and, In a similar process, I was able to associate the image database that I downloaded earlier to this specific image target. Once the database was tied to the image, I was able to place the 3D object within the scene. In order to tie the 3D object to the image target so that it appeared when the image was seen by the device’s camera, I made the 3D object a child to the image target. Once I hit Play and placed the image in view of my device’s camera, I was able to see the 3D object on top of the image target.
Try This at Home (or Work)
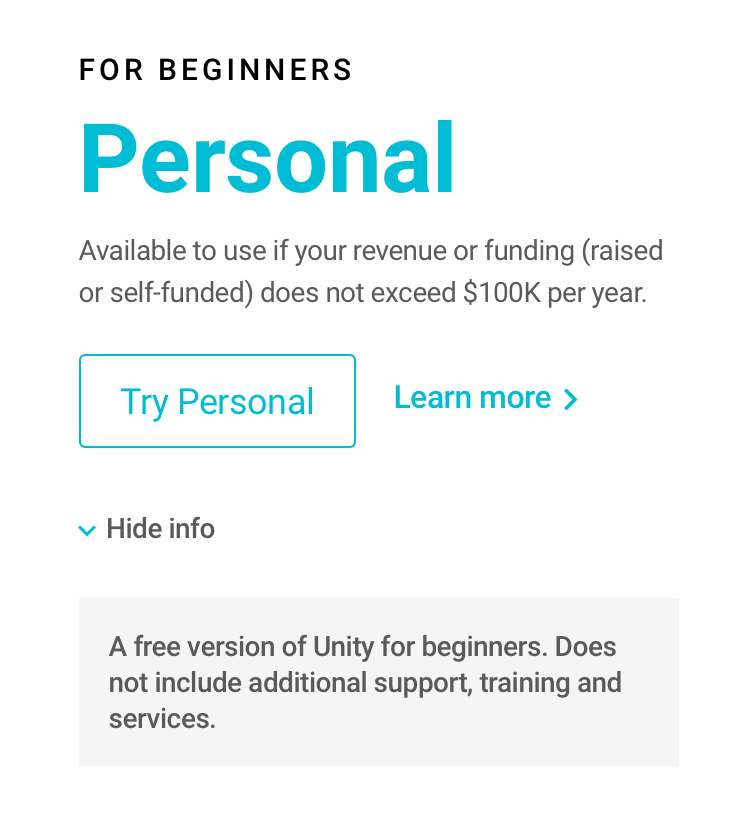
Visit unity3d.com and then click the Get Unity button on the homepage. Choose For Beginners/Personal as your use case and click Try Personal.
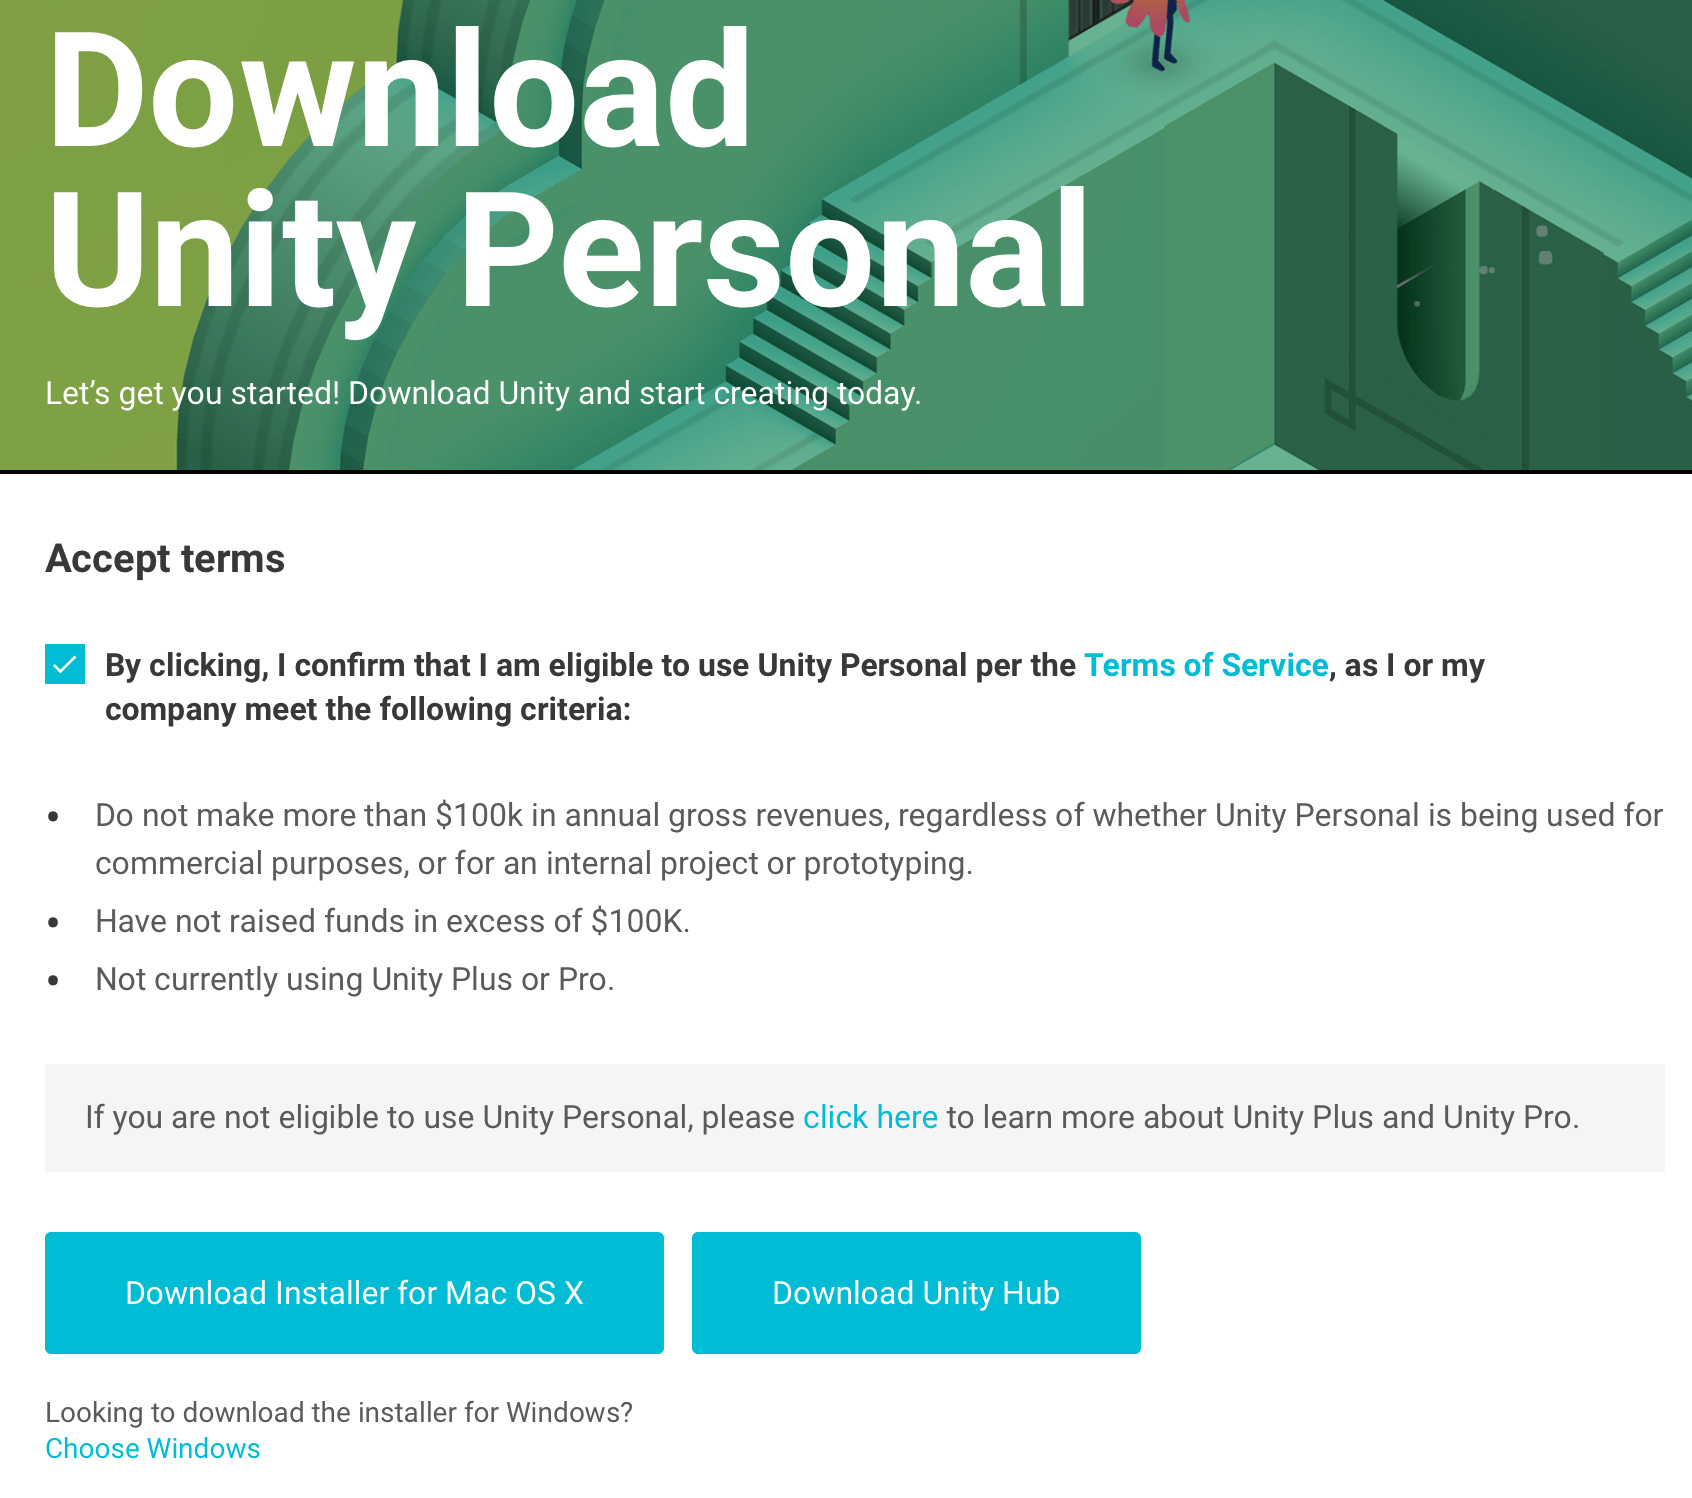
Confirm the Terms of Service and check click the Download Installer for [your operating system] button.
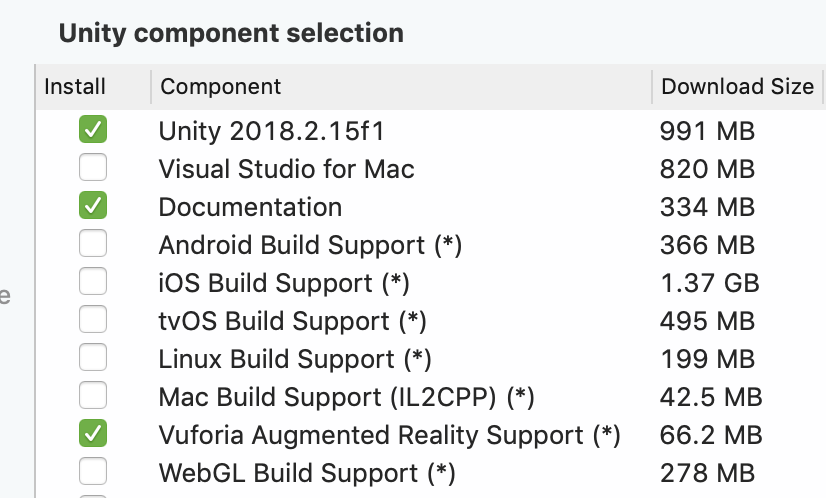
Follow the installation process for your operating system as normal. Be sure to select the Vuforia Augmented Reality Support component when prompted to make Unity Component Selection.
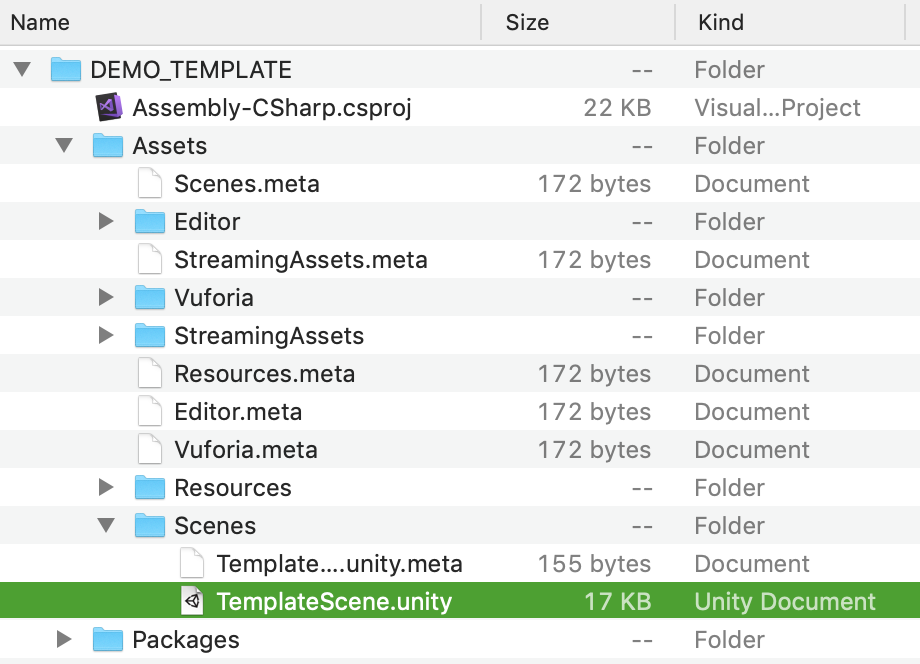
Download the project files (right) and unzip DEMO_TEMPLATE.zip if your computer doesn’t do so automatically.
Open the resulting DEMO_TEMPLATE folder and navigate to Assets > Scenes and choose the TemplateScene.unity file. Double-click to open.
Download the Files
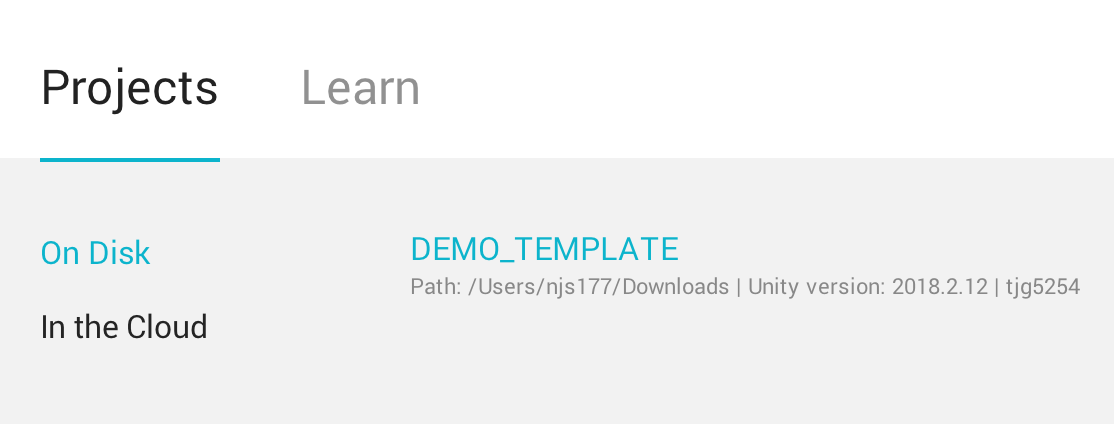
Unity will launch and a window will open listing Projects both On Disk (local to your computer) and In the Cloud (online). Click once on the blue DEMO_TEMPLATE title.
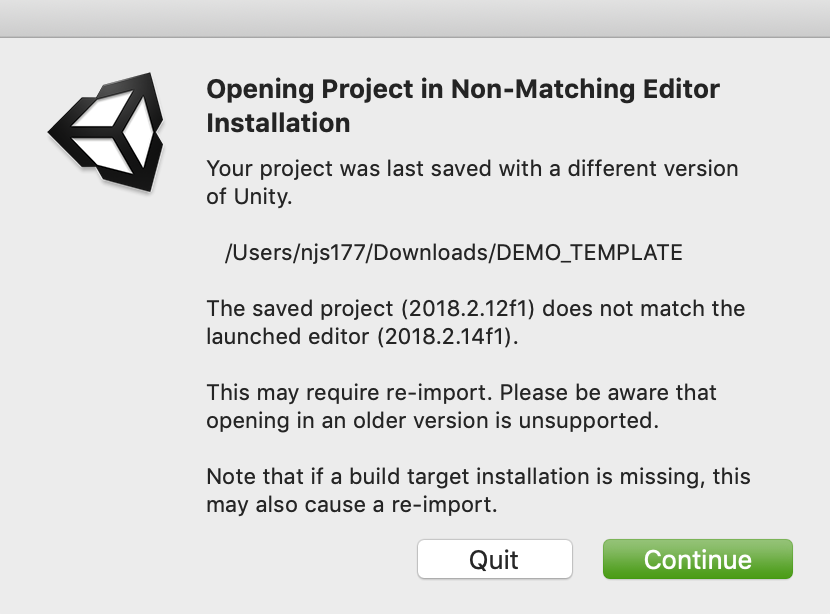
Click Continue in the dialogue that appears asking about a Non-Matching Editor Installation (this is basically just indicating that the template didn’t originate on your computer).
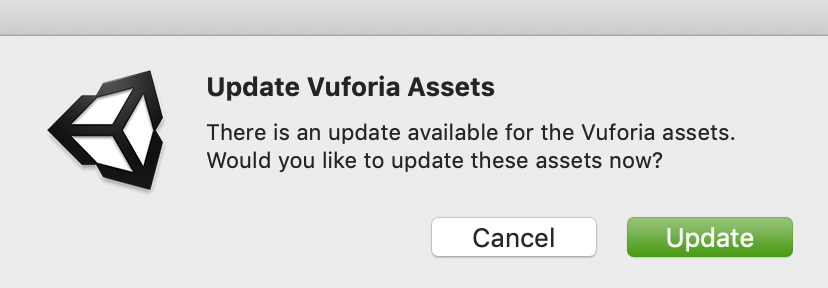
If prompted, click Update when asked whether or not you would like to Update Vuforia Assets.

To continue, you will need to transfer the Trigger Image file to your mobile device. There are many ways to do this: between Mac and iPhone, you can use AirDrop (below) or email the file to yourself, upload it to Box and save it using the corresponding mobile app, etc.

Click the Play button above the view of your Scene in the main portion of the Unity window.
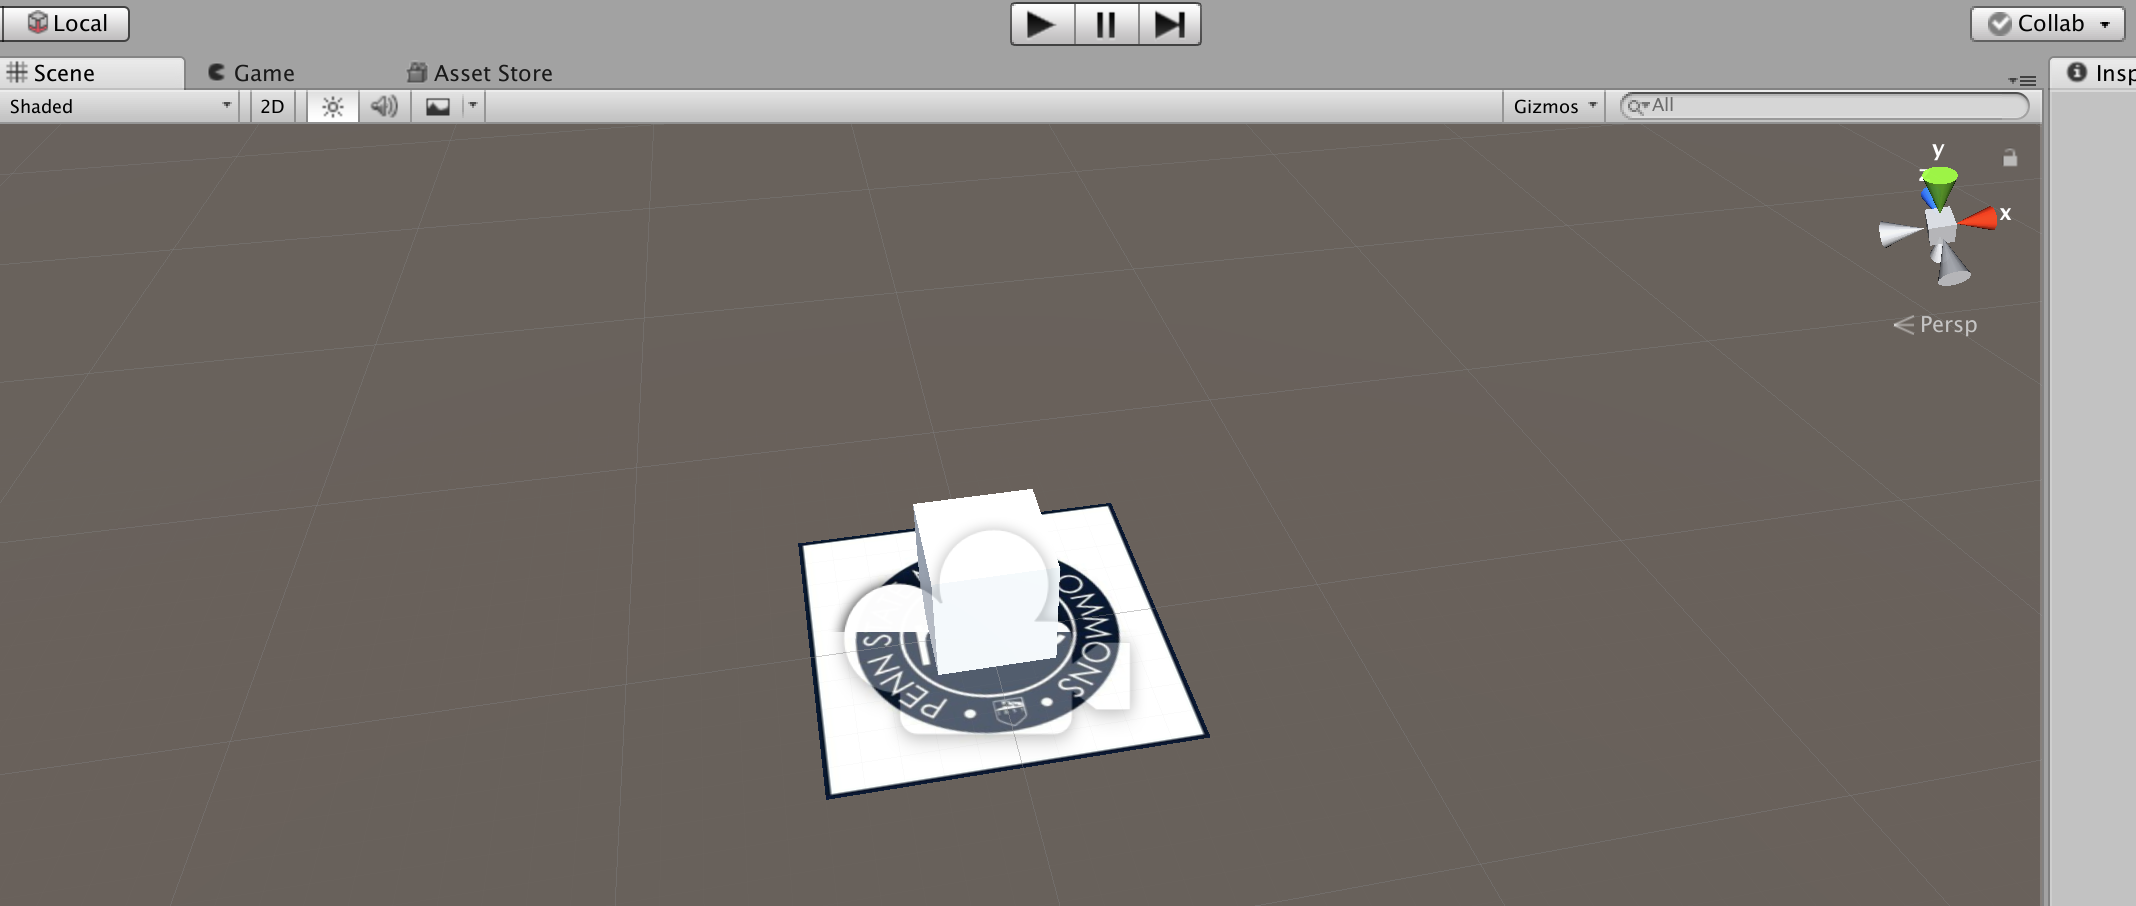
Open the Trigger Image on your mobile device and point it at your computer’s (now active) camera. You should see a cube appear on top of the Trigger – congratulations!
Working with 3D Objects in Augmented Reality
Explore Further
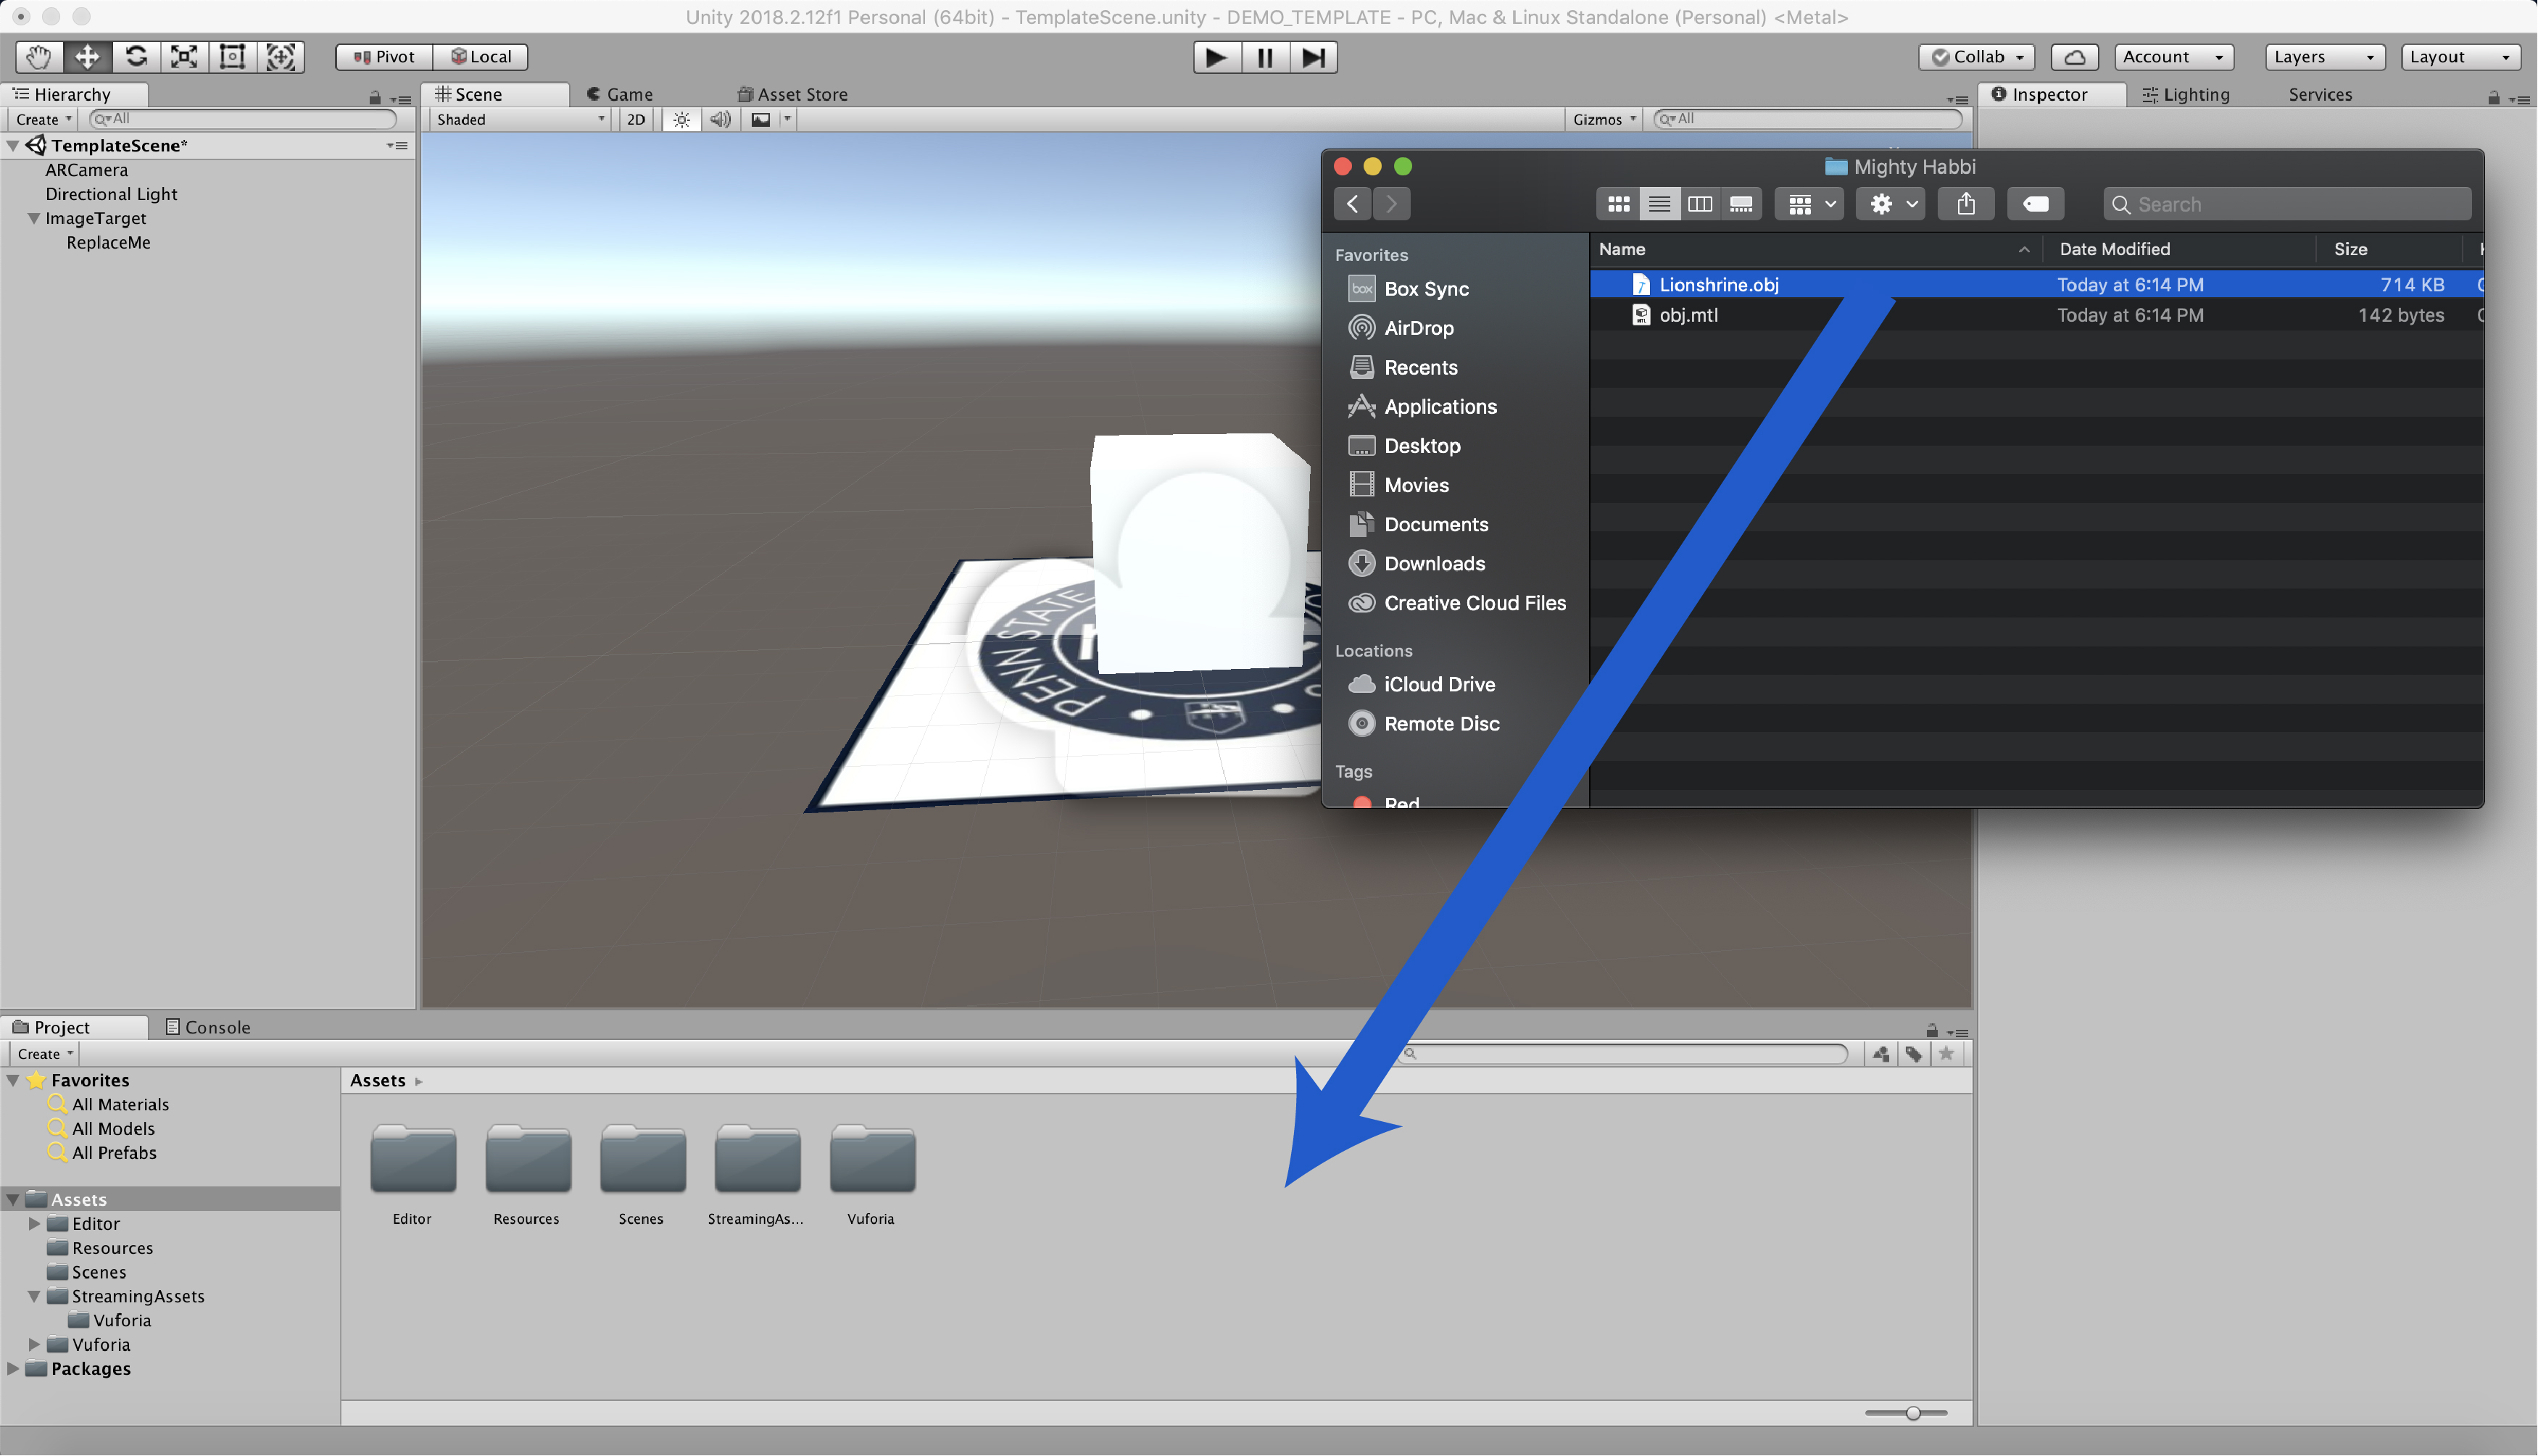
There are multiple ways to add an to add new objects to your Augmented Reality app. If you are familiar with 3D software such as Maya, Blender or TinkerCAD you are able to export files as object (.obj) files and import them into Unity by dragging and dropping the file into the Assets window.
If you would like files that are free under Creative Commons, you could check out Thingiverse. Thingiverse is a free library of 3D files that can be placed within your project. If a file is not an object file but rather a Standard Tessellation Language (.stl) file then we will have to use a 3D software like TinkerCAD to change the file type to .obj.
To place files and export files in TinkerCAD, check out tinkercad.com/learn/ for a walk through the program and demonstration on how to export files.
Once you have a .obj file, you can import it into a Unity project. To do so, simply locate it on your Desktop, Downloads folder, etc and drag and drop the .obj file into the Asset window of Unity (the lower window in the user interface). Once the model is imported it should appear in the Assets folder where it was dropped.
Now that the file is inside Unity, we can make this Shape the Child to our Image Target. Be mindful of scale, position and rotation of the 3D model: we want to imagine our image target is the stage and our 3D models are the actors. Nothing will show on our camera if we don’t have actors on the stage! If we adjust the Position and Rotation to 0 that should place our model (actors) at the center of our Image Target (stage).
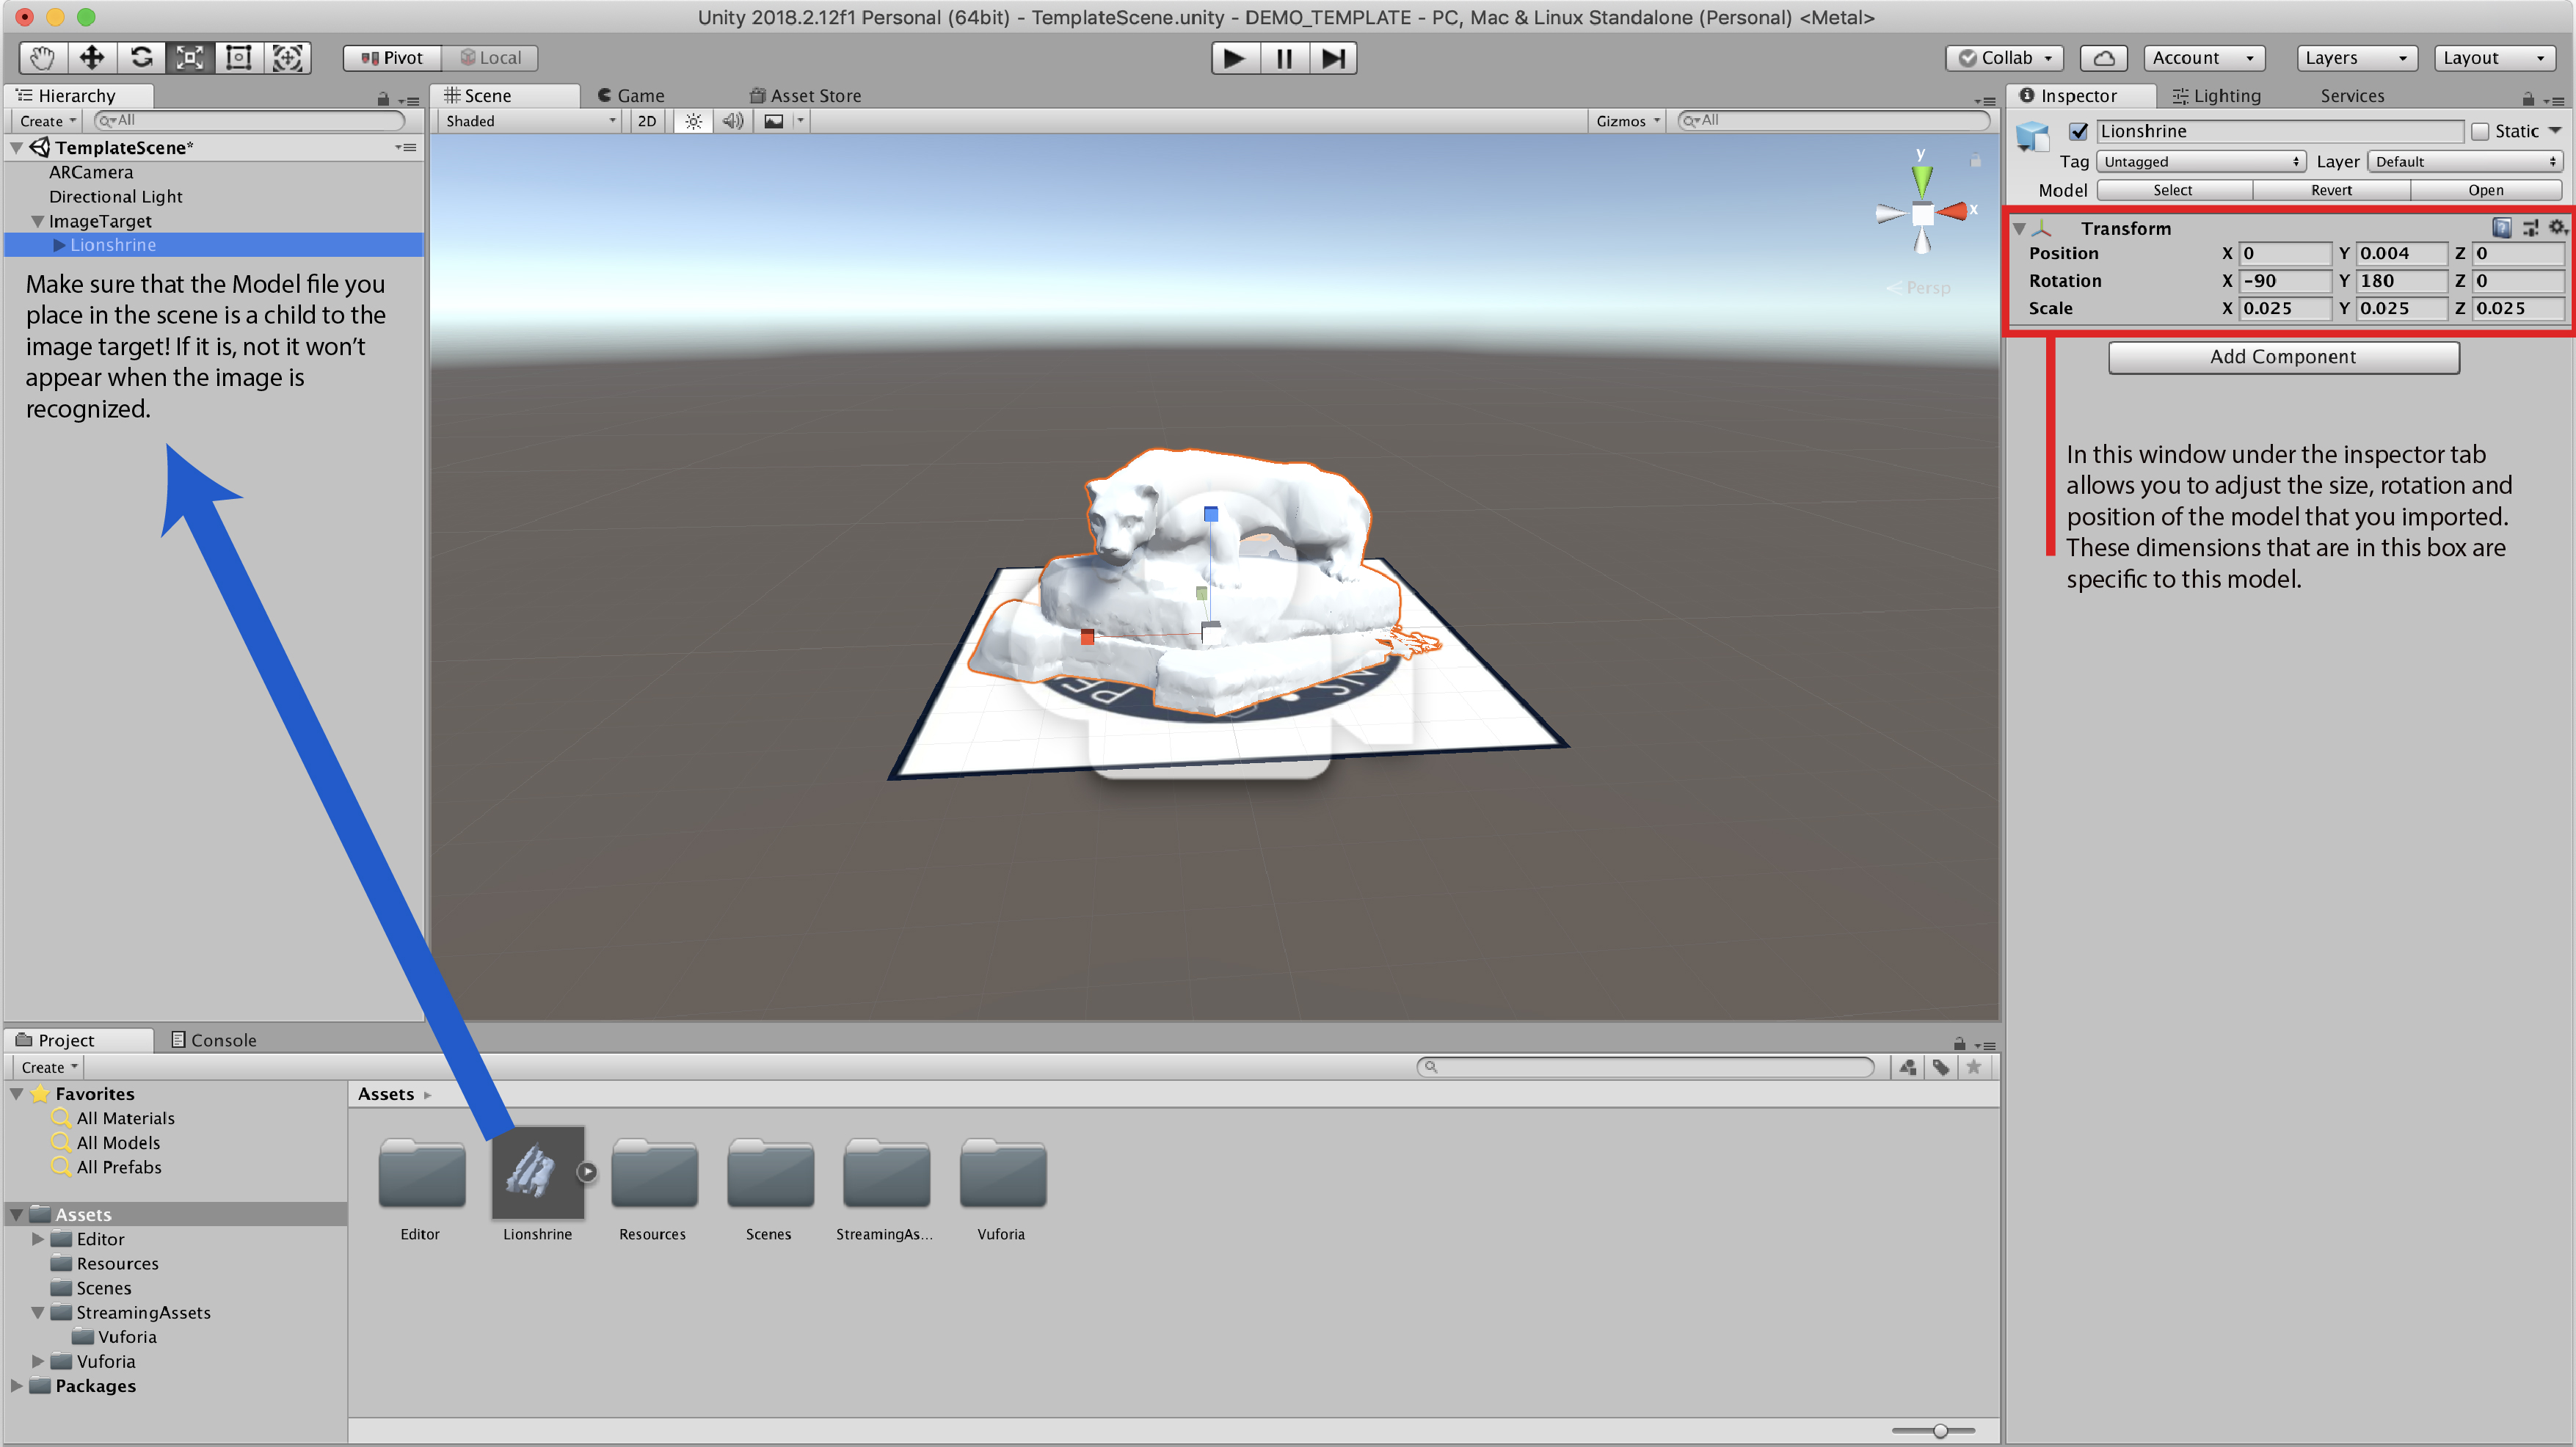
Now, we need to work with Scale. Sometimes a model is too big and is larger than our camera, so we won’t see anything. If the Scale is adjusted to 1 try bumping down the Scale of the X, Y and Z Coordinates. In the past, I have used 0.01 and it at least makes the model visible – if it’s too small feel free to scale it up to meet your needs.
Finally, Unity also has an asset store that can be used to download models. Once these models are imported into the project you can place them just like an object file that was imported.